
4 Ways to Add Texture in Procreate
If you’re just starting out in Procreate or have been using the app for a while, you may be wondering how you can add another layer of detail and dimension to your artwork. Adding texture to your lettering or illustrations helps the piece come to life and can help you develop a distinct personal touch that is recognizable to your online audience.
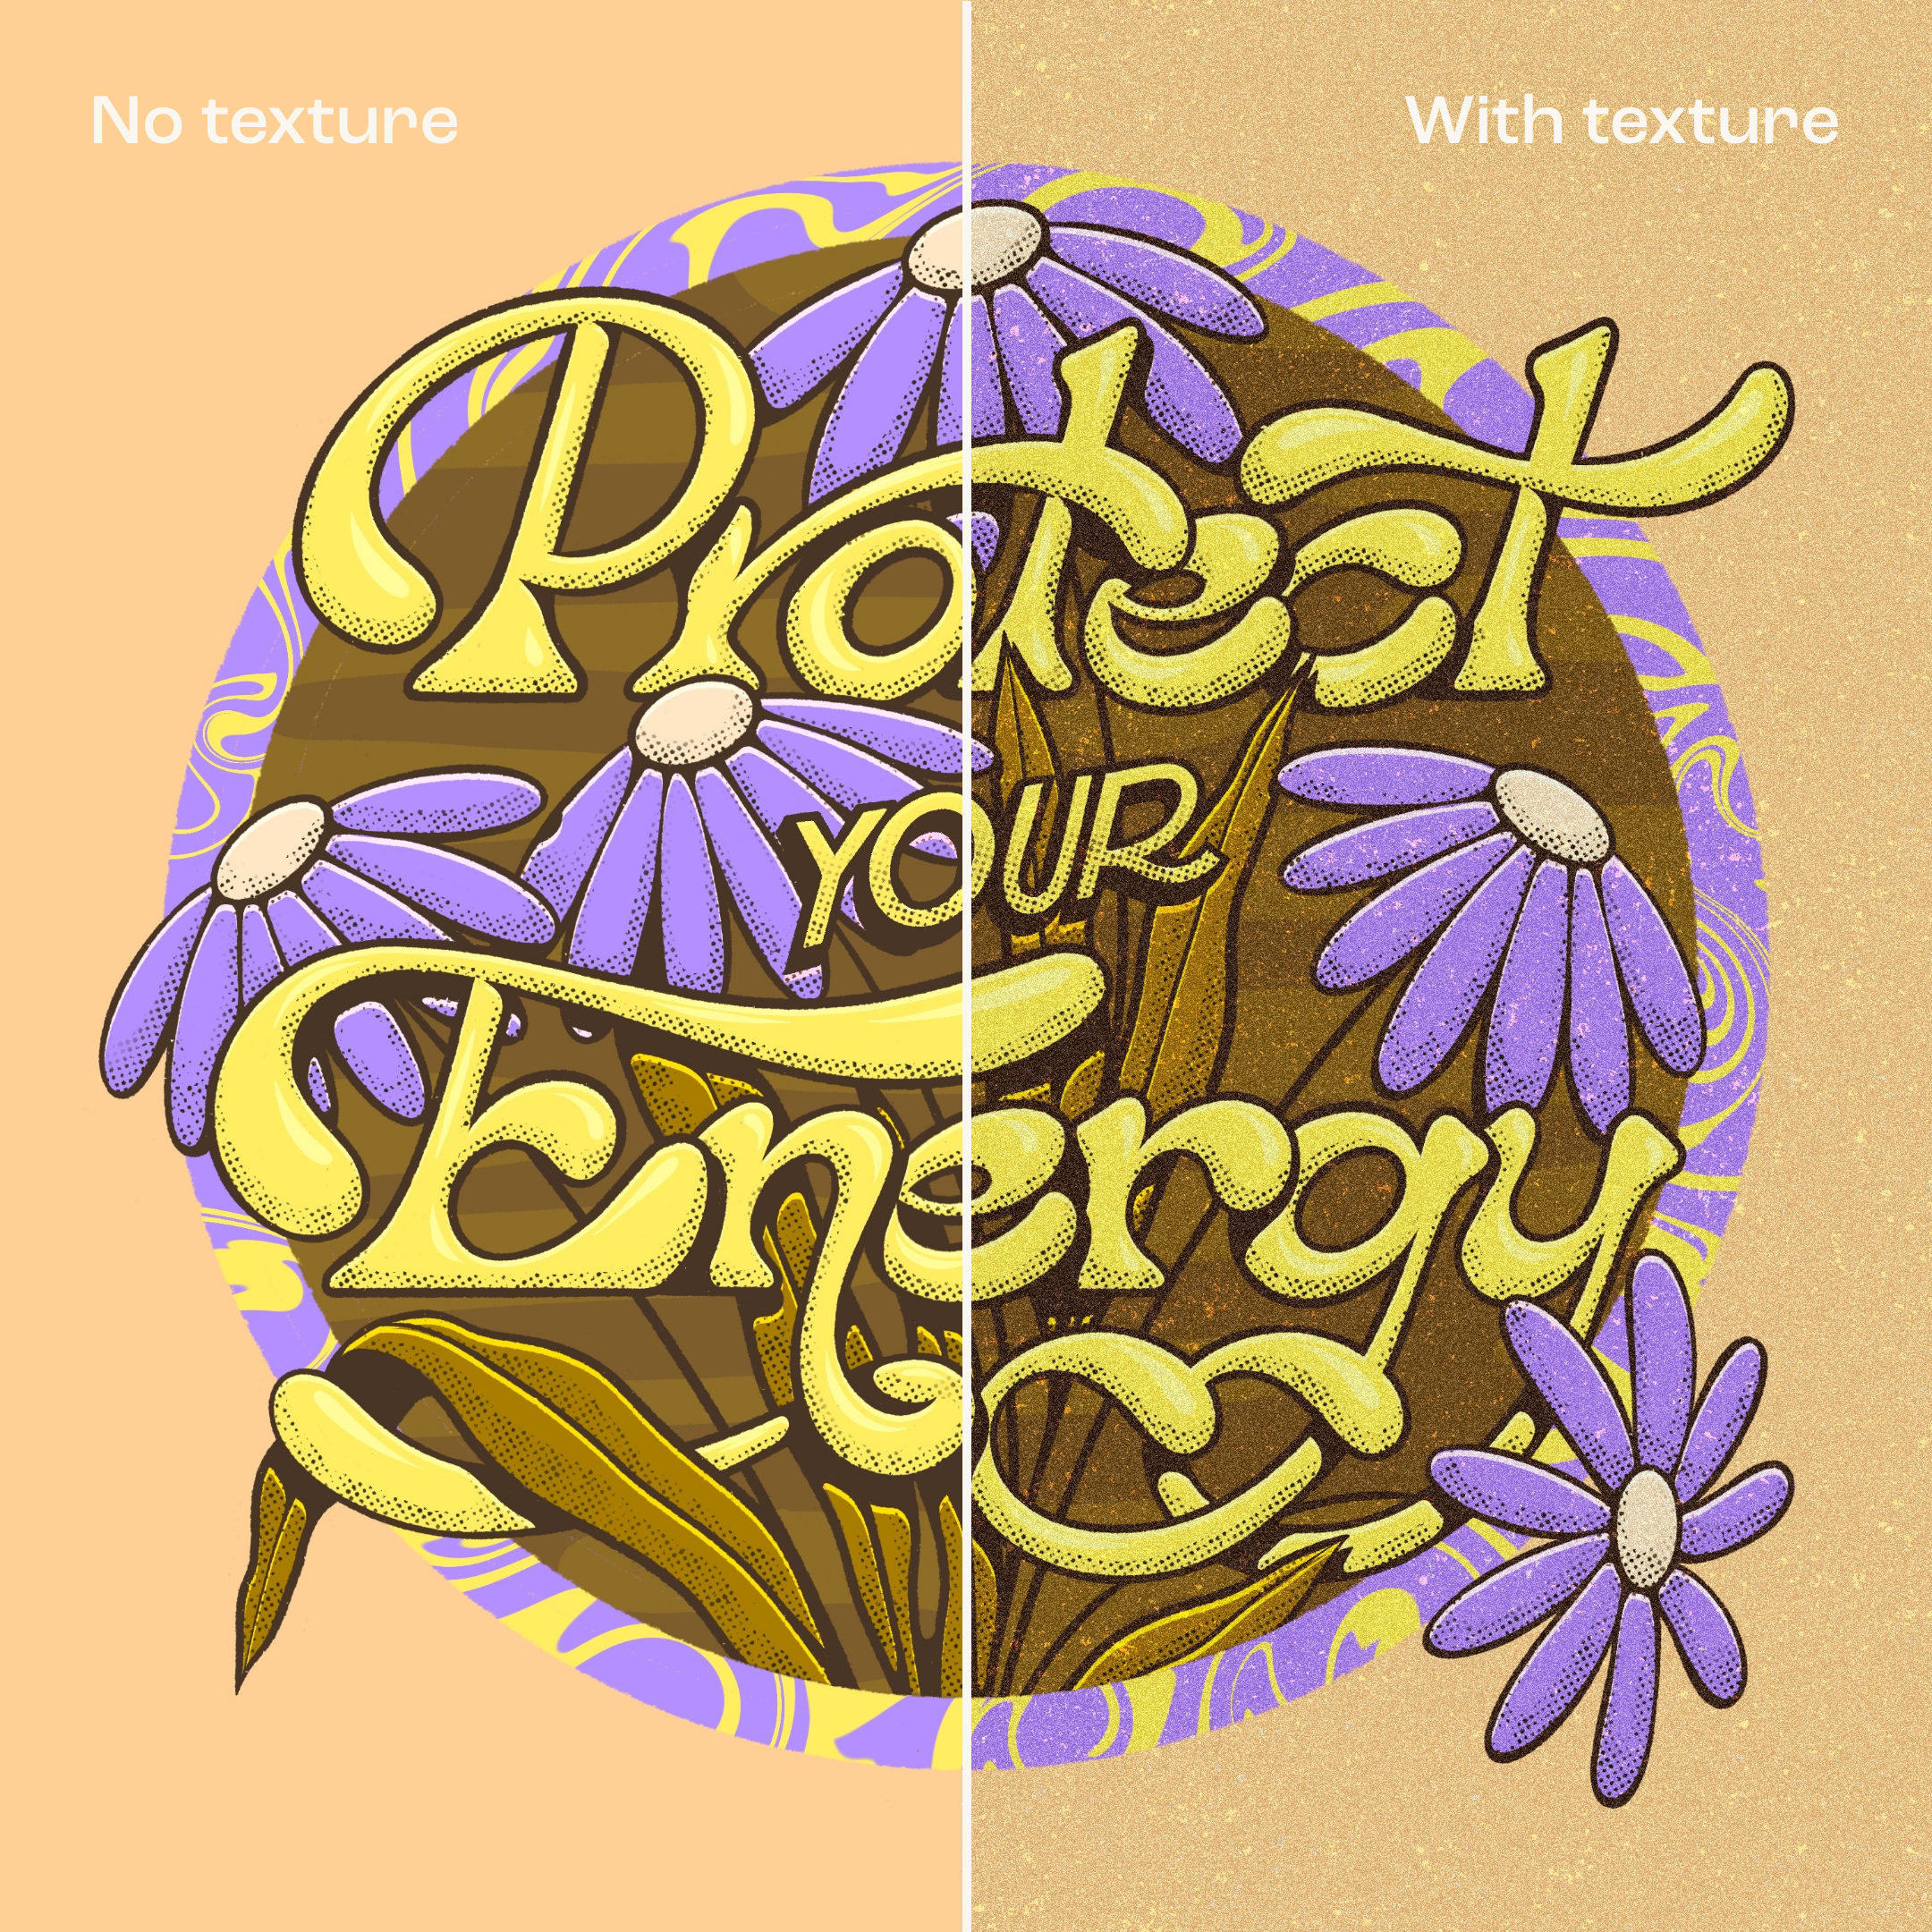
Don’t believe that texture makes a world of a difference to your artwork? Take a look at the before and after example applied to a piece of my lettering artwork below!
These are my top 4 favourite ways to add texture in Procreate! So let’s dive in and learn how to level up your lettering and illustrations with a few quick and easy tips.
Method 1. Add a high resolution image of a texture
This first method of adding texture is very commonly used to achieve that paper-like texture on a piece of digital artwork. Find a high quality JPEG/PNG of a textured type of paper online and insert it on top of your finished artwork in Procreate.
How to:
Find a high quality image of a paper texture online, or scan a piece of textured paper onto your computer. You can use websites such as Pexels, Unsplash, or Creative Market to find high quality images.
Ensure this image is accessible from your iPad.
In the Procreate app, tap the ‘Wrench Icon’ and tap ‘Insert File’ or ‘Insert Image’ (depending on where you have the image saved).
Make sure the inserted image is at the top of your layer list.
Resize the image to cover your canvas.
Experiment with the different blend mode options to find one of your liking (this can vary based on colours used/composition). Do this by tapping the ‘N’ on the image layer in your layer list.
You’ve achieved a paper-like texture for your artwork!
Method 2. Add a noise adjustment to your layer(s)
This is my favourite go-to method for adding texture to my artwork. Procreate’s available Noise adjustment settings provide you with ample customization options for adding that signature ‘grainy’ texture to your artwork.
How to:
Open your artwork in the Procreate app.
Ensure you have the layer selected that you want to add the noise adjustment to. If you want to add the noise adjustment to your entire artwork (all layers), then I suggest first duplicating your canvas and then merging all of your layers together on the duplicated copy. This will allow you to apply the noise adjustment to 1 single layer.
Tap the ‘Magic Wand Icon’, then select ‘Noise’.
Slide your finger left or right along the screen to increase/decrease the amount of noise applied.
At the bottom of your screen you’ll notice 3 different noise types: Clouds, Billows, and Ridges. You can tap each of these options to see which one you prefer for your artwork.
When you’re done adjusting the noise, tap the ‘Magic Wand Icon’ again to apply the adjustment to your artwork.
You’ve achieved a noise texture for your artwork!
Method 3. Add a halftone adjustment to your layer(s)
This is another go-to method for adding texture to your artwork. Procreate’s allows you to add a Halftone adjustment setting to your layers. This creates a visual halftone effect, where your artwork will be made up of many small dots.
How to:
Open your artwork in the Procreate app.
Ensure you have the layer selected that you want to add the halftone adjustment to. If you want to add the halftone adjustment to your entire artwork (all layers), then I suggest first duplicating your canvas and then merging all of your layers together on the duplicated copy. This will allow you to apply the halftone adjustment to 1 single layer.
Tap the ‘Magic Wand Icon’, then select ‘Halftone’.
Slide your finger left or right along the screen to increase/decrease the amount of halftone applied. I find that less is more in this case, so I recommend between 5–10% halftone.
At the bottom of your screen you’ll notice 3 different halftone types: Full Color, Screen Print, or Newspaper. You can tap each of these options to see which one you prefer for your artwork.
When you’re done adjusting the halftone, tap the ‘Magic Wand Icon’ again to apply the adjustment to your artwork.
You’ve achieved a halftone texture for your artwork!
Method 4. Use a textured brush
The last (and possibly most effective) way to add texture to your artwork in Procreate would be by using a textured brush. There are so many independent artists who have created custom brush packs for Procreate. You can browse various brush packs on Creative Market, or you can find ones created by artists you know and love. My favourite Procreate brush creator would be Jimbo Bernaus of Shoutbam – his brush packs are AMAZING! My top 3 favourite brush packs of his are the Dirty Halftones Brush Set (used in the example video below), Wet & Dry Brush Set, and the On The Road Brush Set, to name a few.
How to:
Open your artwork in the Procreate app.
Create a new layer at the top of the layer list.
Select a textured brush of your choosing.
Use the textured brush to add texture on top of your artwork. In this example, I covered the full canvas/layer in the texture.
Tap the ‘N’ on the selected layer to adjust the blending options. This will alter how the texture appears on top of your other layers.
You’ve achieved a brush texture for your artwork!
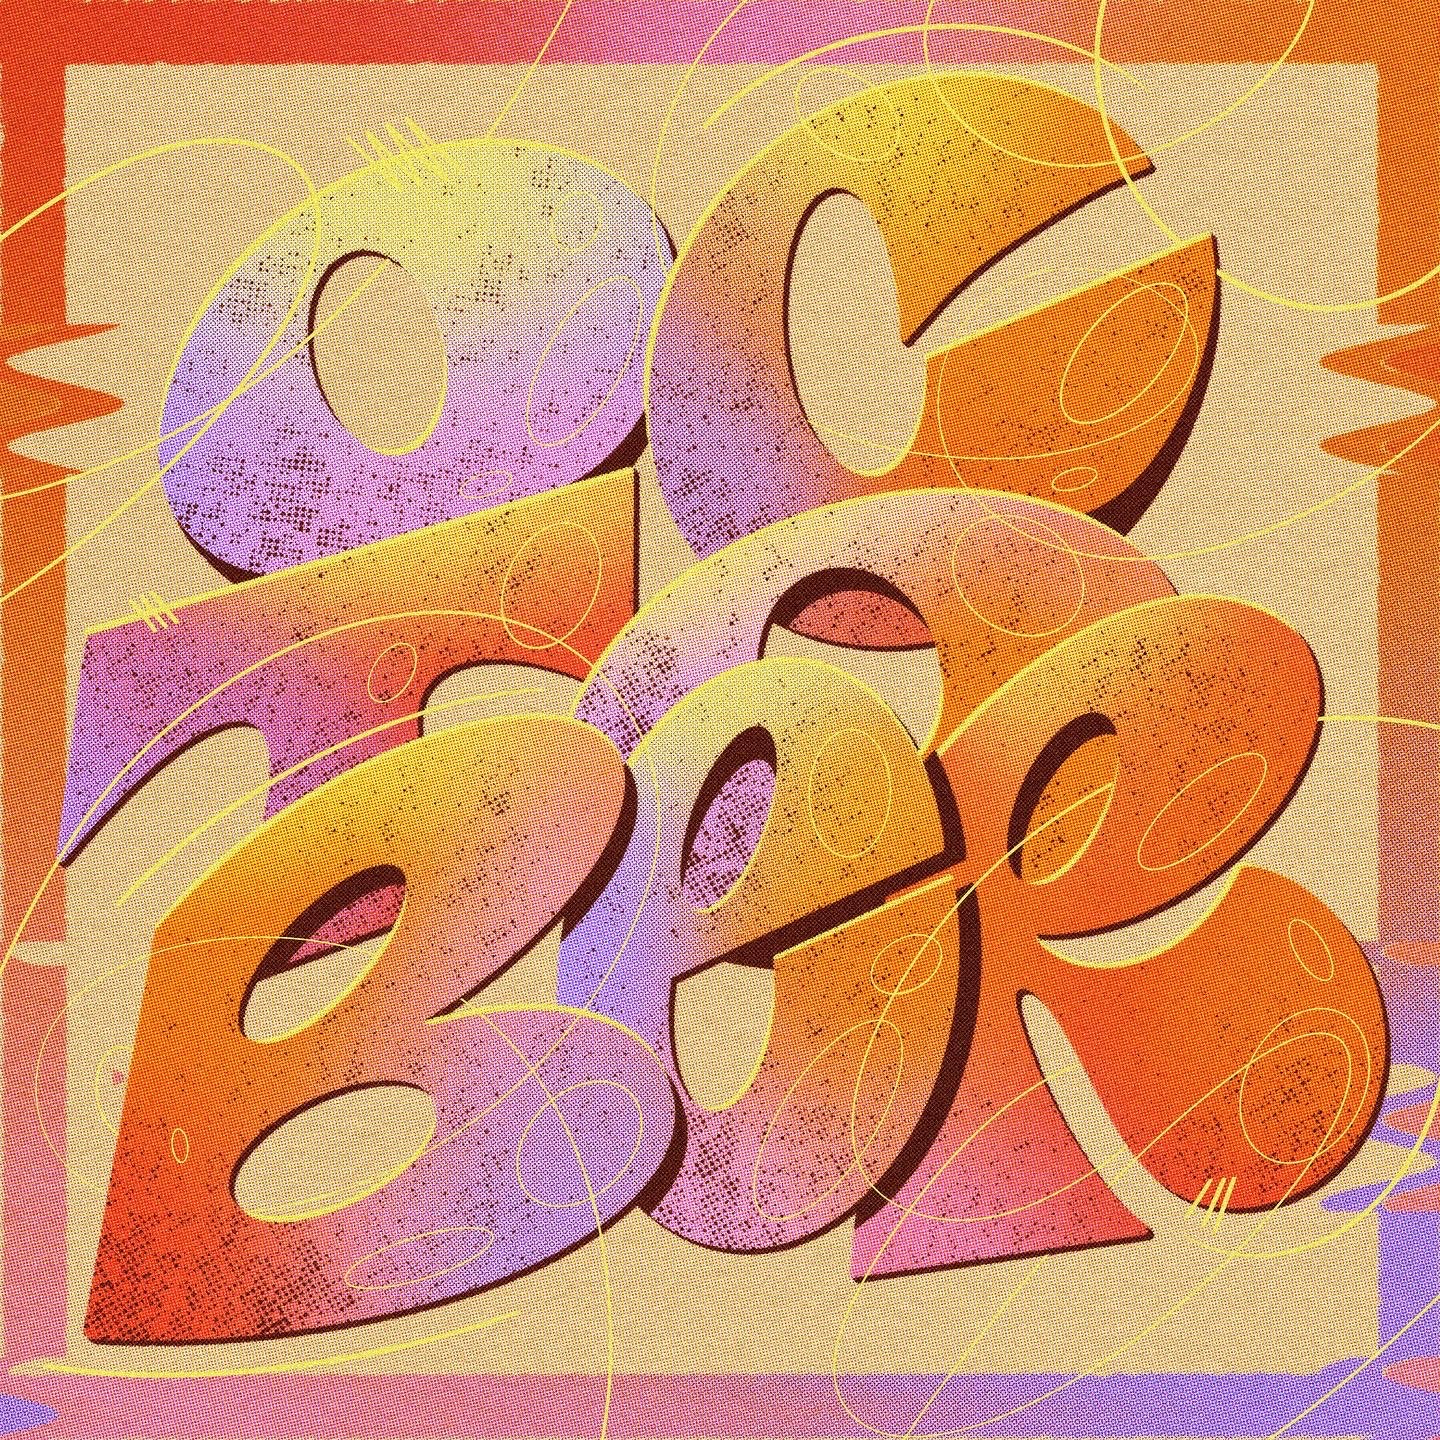
What does texture look like in the wild?
Here are some examples of ways that I’ve applied texture to different lettering pieces I created. All four of these examples include:
A noise adjustment (this is my favourite method — it’s applied over top of each piece)
A textured brush for shading (as seen in ‘Fresh’)
A textured brush to add detail to letters (as see in ‘October’)


I hope that you’ve learned about a new way to add texture to your lettering and illustrations in the Procreate app. These are not all the ways to add texture, but they are my favourite methods to add another level of detail to any piece I’m working on.
Out of these four methods, what is your favourite way to add texture in Procreate? Leave a comment down below!